Building a Countdown Timer
The first two tutorials in this series were both about reacting to things the visitor does — a click, a keystroke, a form submission. This one introduces a different kind of JavaScript entirely: code that runs on its own, on a schedule, with nobody clicking anything at all. A countdown timer — Start, Pause, Reset, a big MM:SS readout counting down once a second — is the simplest possible project built around that idea, and it's also the pattern behind progress bars, auto-advancing slideshows, polling a server for updates, and anything else that needs to happen "every N seconds" rather than "when the visitor does X."
Prerequisites: Your First JavaScript Program and
Build a Dynamic To-Do List — this tutorial assumes you're
comfortable with attribute-based event binding (onclick), document.getElementById,
and reading/writing .textContent and .value. No new DOM-creation concepts this time
— the whole focus is on one new mechanism: running code repeatedly over time.
In This Tutorial
- Understand the difference between an event (something the visitor did) and a scheduled callback (something that just happens on a timer) — and why only one of those two is ever bound with an HTML attribute
- Use
setInterval()to run a function every second, andclearInterval()to stop it - Manage a small set of UI states (running / paused / finished) by enabling and
disabling buttons with the
.disabledproperty - Format a raw number of seconds as a
MM:SSstring withMath.floor(), the%(modulo) operator, and.padStart() - Drive a visual progress bar by setting
.style.widthdirectly - Build and understand a complete three-file project, then try the real thing running
Part 1: Events vs. Scheduled Callbacks
Every function call you've seen so far in this series has been a direct reaction to
something the visitor physically did: onclick="startTimer()" only runs startTimer()
the instant someone clicks that exact button. Nothing runs on its own.
A countdown timer can't work that way. Once you press Start, the display needs to update every second — 04:59, 04:58, 04:57 — with nobody clicking anything in between. JavaScript's answer to "run this repeatedly, on a schedule" is a completely different mechanism from event binding:
This tells the browser: "starting now, call someFunction every 1000 milliseconds (one
second), forever, until I say stop." setInterval() returns an ID number immediately
— you must save that ID, because it's the only way to later say "stop" with
clearInterval(thatId).
This is not attribute binding, and that's intentional
You will not find setInterval written anywhere in this tutorial's HTML, and
that's the whole point. Attribute binding (onclick, oninput, onchange) exists
specifically to connect an event — something the browser notices happening to a
specific element — to a function. A ticking clock isn't an event on any element; it's
just time passing. So setInterval() is called once, in plain JavaScript, from
inside the function that a real onclick attribute does trigger (startTimer(),
below) — the user-facing Start/Pause/Reset buttons are still exclusively
attribute-bound, same as every other tutorial in this series; it's specifically the
once-a-second ticking that uses a different tool, because it's solving a genuinely
different problem.
Part 2: Set Up Your Project Folder
Same three-file shape as the previous two tutorials:
Part 3: Build the Complete HTML
<!DOCTYPE html>
<html lang="en">
<head>
  <meta charset="UTF-8">
  <meta name="viewport" content="width=device-width, initial-scale=1.0">
  <title>My Countdown Timer</title>
  <link rel="stylesheet" href="style.css">
</head>
<body>
  <div class="container">
    <header>
      <h1>Countdown Timer</h1>
      <p class="subtitle">Start, pause, and reset — built with plain JavaScript.</p>
    </header>

    <main>
      <div class="setup">
        <label for="minutesInput">Minutes</label>
        <input type="number" id="minutesInput" value="5" min="1" max="60">
      </div>

      <p id="timeDisplay">05:00</p>

      <div class="progress-track">
        <div class="progress-fill" id="progressFill"></div>
      </div>

      <p id="statusMessage" class="status"></p>

      <div class="controls">
        <button id="startBtn" onclick="startTimer()">Start</button>
        <button id="pauseBtn" onclick="pauseTimer()" disabled>Pause</button>
        <button id="resetBtn" onclick="resetTimer()">Reset</button>
      </div>
    </main>

    <footer>
      <p>Built with HTML, CSS, and plain JavaScript — no frameworks.</p>
    </footer>
  </div>

  <script src="script.js"></script>
</body>
</html>
Two details worth noticing before moving on:
<button id="pauseBtn" onclick="pauseTimer()" disabled>has a plaindisabledattribute sitting right next to itsonclick— this is ordinary HTML (a disabled button can't be clicked, and ignores itsonclickentirely), and it matches the timer's real starting state: there's nothing running yet, so Pause should start out unusable. JavaScript will flip thisdisabledstate on and off as the timer's situation changes — Part 4 covers exactly how.<input type="number" id="minutesInput" value="5" min="1" max="60">usestype="number"specifically, which gives you browser-native up/down arrows and prevents typing non-numeric characters, for free, with no JavaScript required.
Part 4: Write the Complete JavaScript
// How many seconds the countdown started at (for the progress bar's math)
// and how many are left right now. intervalId is null whenever the timer
// is NOT currently running — that's what lets startTimer()/pauseTimer()
// tell "running" from "not running."
let totalSeconds = 0;
let remainingSeconds = 0;
let intervalId = null;

// Turns a count of seconds into a "MM:SS" string, always two digits each.
function formatTime(seconds) {
  const minutes = Math.floor(seconds / 60);
  const secs = seconds % 60;
  return String(minutes).padStart(2, "0") + ":" + String(secs).padStart(2, "0");
}

// Writes the current remainingSeconds to the page: the big MM:SS readout
// and the progress bar's width.
function updateDisplay() {
  document.getElementById("timeDisplay").textContent = formatTime(remainingSeconds);

  const percentElapsed = ((totalSeconds - remainingSeconds) / totalSeconds) * 100;
  document.getElementById("progressFill").style.width = percentElapsed + "%";
}

// This is NOT bound to any HTML attribute — nothing ever writes
// onclick="tick()" anywhere. It's called by setInterval(), below, which is
// a completely different mechanism: "run this function automatically,
// over and over, every N milliseconds," with no user interaction involved.
function tick() {
  remainingSeconds = remainingSeconds - 1;
  updateDisplay();

  if (remainingSeconds <= 0) {
    finishTimer();
  }
}

function finishTimer() {
  clearInterval(intervalId);
  intervalId = null;

  document.getElementById("statusMessage").textContent = "Time's up!";
  document.getElementById("startBtn").disabled = false;
  document.getElementById("pauseBtn").disabled = true;
}

// Called by the Start button's onclick="startTimer()" attribute.
function startTimer() {
  if (intervalId !== null) {
    return; // already running — ignore a second click
  }

  document.getElementById("statusMessage").textContent = "";
  document.getElementById("startBtn").disabled = true;
  document.getElementById("pauseBtn").disabled = false;
  document.getElementById("minutesInput").disabled = true;

  // setInterval's first argument is the function to run, the second is the
  // delay in milliseconds between each run. It immediately returns an ID
  // number — save it, because that ID is the only way to cancel this
  // interval later with clearInterval().
  intervalId = setInterval(tick, 1000);
}

// Called by the Pause button's onclick="pauseTimer()" attribute.
function pauseTimer() {
  if (intervalId === null) {
    return; // not running — nothing to pause
  }

  clearInterval(intervalId);
  intervalId = null;

  document.getElementById("startBtn").disabled = false;
  document.getElementById("pauseBtn").disabled = true;
}

// Called by the Reset button's onclick="resetTimer()" attribute. Also
// called once at the very bottom of this file to set up the initial
// display when the page first loads.
function resetTimer() {
  clearInterval(intervalId);
  intervalId = null;

  const minutesInput = document.getElementById("minutesInput");
  const minutes = Number(minutesInput.value) || 5;

  totalSeconds = minutes * 60;
  remainingSeconds = totalSeconds;

  document.getElementById("statusMessage").textContent = "";
  document.getElementById("startBtn").disabled = false;
  document.getElementById("pauseBtn").disabled = true;
  minutesInput.disabled = false;

  updateDisplay();
}

// Not bound to any event — just the next line in the file, so it runs
// once, immediately, to draw 05:00 (or whatever the input says) before
// anyone has clicked anything.
resetTimer();
Let's go through the new ideas one at a time.
formatTime() — turning a number into "05:00"
function formatTime(seconds) {
  const minutes = Math.floor(seconds / 60);
  const secs = seconds % 60;
  return String(minutes).padStart(2, "0") + ":" + String(secs).padStart(2, "0");
}
Internally, this whole program only ever thinks in total seconds (300 for 5
minutes) — never minutes-and-seconds as two separate numbers. formatTime() is the one
place that gets converted into something readable:
Math.floor(seconds / 60)— dividing by 60 and rounding down gives the whole number of minutes.299 / 60is4.98...;Math.floor()turns that into4.seconds % 60— the%(modulo) operator gives you the remainder of a division.299 % 60is59— the leftover seconds that don't make up a full minute..padStart(2, "0")is a string method: "make sure this string is at least 2 characters long, and if it's shorter, add"0"to the front until it is." Without it, 4 minutes and 9 seconds would display as"4:9"instead of the expected"04:09"—padStartis what guarantees the leading zero.
updateDisplay() — .style.width, a shorthand you haven't used yet
const percentElapsed = ((totalSeconds - remainingSeconds) / totalSeconds) * 100;
document.getElementById("progressFill").style.width = percentElapsed + "%";
(totalSeconds - remainingSeconds) is how many seconds have elapsed so far; dividing
that by totalSeconds and multiplying by 100 turns it into a percentage (0 at the
start, 100 right when it finishes). Setting .style.width directly to a string like
"40%" is a shorthand cousin of tutorial 1's style.setProperty("--color-primary",
color) — both write directly to an element's inline style, but .style.width = "..."
sets one specific, well-known CSS property by name, while .setProperty() is the more
general form you reach for with a custom property (one starting with --). Either
way, the moment this line runs, the browser repaints that <div> at its new width —
that's what makes the bar visibly grow every second.
tick(), startTimer(), and the intervalId pattern
function tick() {
  remainingSeconds = remainingSeconds - 1;
  updateDisplay();
  if (remainingSeconds <= 0) { finishTimer(); }
}
Every second, tick() does exactly three things: count down by one, redraw the display,
and check whether it just hit zero. Nothing here is bound to any attribute — the only
thing that ever calls tick() is the browser itself, once a second, because of this
line inside startTimer():
Notice tick is passed without parentheses — setInterval(tick, 1000), not
setInterval(tick(), 1000). tick (no parentheses) means "here's the function itself,
call it later"; tick() (with parentheses) would mean "call it right now, and give
setInterval whatever it returns" — which is not what you want at all. This exact
same without-parentheses rule applies to onclick="startTimer()" too, if you look
closely: that one does have parentheses, because the browser is the one adding "when
clicked, run this code" around it — you're providing an expression to evaluate on
click, not a bare function reference. Both are correct; they're just two different
situations.
startTimer() guards against a subtle bug with one line at the very top:
Without this check, clicking Start twice in a row (easy to do accidentally) would
call setInterval() a second time, creating a second independent countdown ticking
alongside the first — now remainingSeconds decreases by 2 every second instead of 1,
and you'd have no way to stop one without stopping the other, because you only ever
saved one intervalId. Checking "is one already running?" before starting another is
the standard fix, and it's exactly why intervalId is set back to null the moment a
countdown is paused, finished, or reset — null is this program's way of representing
"nothing is running right now."
Button states — .disabled, a property you haven't used yet
document.getElementById("startBtn").disabled = true;
document.getElementById("pauseBtn").disabled = false;
Every button and input element has a .disabled property — set it to true and the
element visibly grays out and stops responding to clicks or typing (its onclick
simply won't fire); set it back to false and it's interactive again. This timer has
three situations — not running, running, finished — and every function that
changes which situation you're in also sets both buttons' .disabled to match: Start
is enabled exactly when Pause is disabled, and vice versa, so the two buttons always
show a state that actually makes sense (you can never see "Pause" available when
nothing is running).
Part 5: Style It With CSS
:root {
  --color-primary: #2b2b7a;
  --color-bg: #f4f4f8;
  --color-card: #ffffff;
  --color-text: #333333;
  --color-done: #1f8a4c;
}

* {
  box-sizing: border-box;
}

body {
  margin: 0;
  font-family: Arial, Helvetica, sans-serif;
  background-color: var(--color-bg);
  color: var(--color-text);
}

.container {
  max-width: 420px;
  margin: 40px auto;
  background-color: var(--color-card);
  border-radius: 12px;
  box-shadow: 0 4px 16px rgba(0, 0, 0, 0.08);
  overflow: hidden;
}

header {
  background-color: var(--color-primary);
  color: white;
  text-align: center;
  padding: 28px 20px;
}

header h1 {
  margin: 0 0 6px;
}

.subtitle {
  margin: 0;
  opacity: 0.85;
  font-size: 14px;
}

main {
  padding: 28px;
  text-align: center;
}

.setup {
  display: flex;
  align-items: center;
  justify-content: center;
  gap: 10px;
  margin-bottom: 20px;
}

.setup label {
  font-size: 14px;
  color: #555;
}

#minutesInput {
  width: 70px;
  padding: 8px 10px;
  font-size: 15px;
  border: 1px solid #ccc;
  border-radius: 6px;
  text-align: center;
}

#minutesInput:disabled {
  background-color: var(--color-bg);
  color: #999;
}

#timeDisplay {
  font-size: 56px;
  font-weight: bold;
  color: var(--color-primary);
  margin: 10px 0;
  font-variant-numeric: tabular-nums;
}

.progress-track {
  height: 10px;
  background-color: var(--color-bg);
  border-radius: 5px;
  overflow: hidden;
  margin-bottom: 14px;
}

.progress-fill {
  height: 100%;
  width: 0%;
  background-color: var(--color-primary);
  transition: width 1s linear;
}

.status {
  min-height: 22px;
  font-weight: bold;
  color: var(--color-done);
  margin: 0 0 16px;
}

.controls {
  display: flex;
  justify-content: center;
  gap: 10px;
}

button {
  padding: 10px 20px;
  background-color: var(--color-primary);
  color: white;
  border: none;
  border-radius: 6px;
  font-weight: bold;
  cursor: pointer;
}

button:disabled {
  background-color: #ccc;
  cursor: not-allowed;
}

footer {
  text-align: center;
  padding: 16px;
  font-size: 13px;
  color: #777;
  border-top: 1px solid var(--color-bg);
}
Two rules do real work here beyond basic appearance:
button:disabled { background-color: #ccc; cursor: not-allowed; }is a CSS pseudo-class that automatically matches any button whose.disabledproperty JavaScript has set totrue— you never have to add or remove a class for this yourself, the browser applies:disabledstyling the instant the property changes. This is why Part 4'sdocument.getElementById("startBtn").disabled = truewas enough on its own to make that button visibly gray out..progress-fill { transition: width 1s linear; }means that whenever.style.widthis changed in JavaScript, the browser animates smoothly from the old width to the new one over 1 second, instead of jumping instantly — sincetick()updates the width exactly once a second, this transition is timed to finish right as the next update arrives, which is what makes the bar appear to creep forward continuously rather than visibly jump in little steps.
Part 6: See It Running
Try it live
This project is deployed right here on the site — open the live demo in a new tab. Set the minutes, hit Start, and watch the display and progress bar update once a second with nobody clicking anything.
Here's the timer a few seconds after starting a 5-minute countdown:
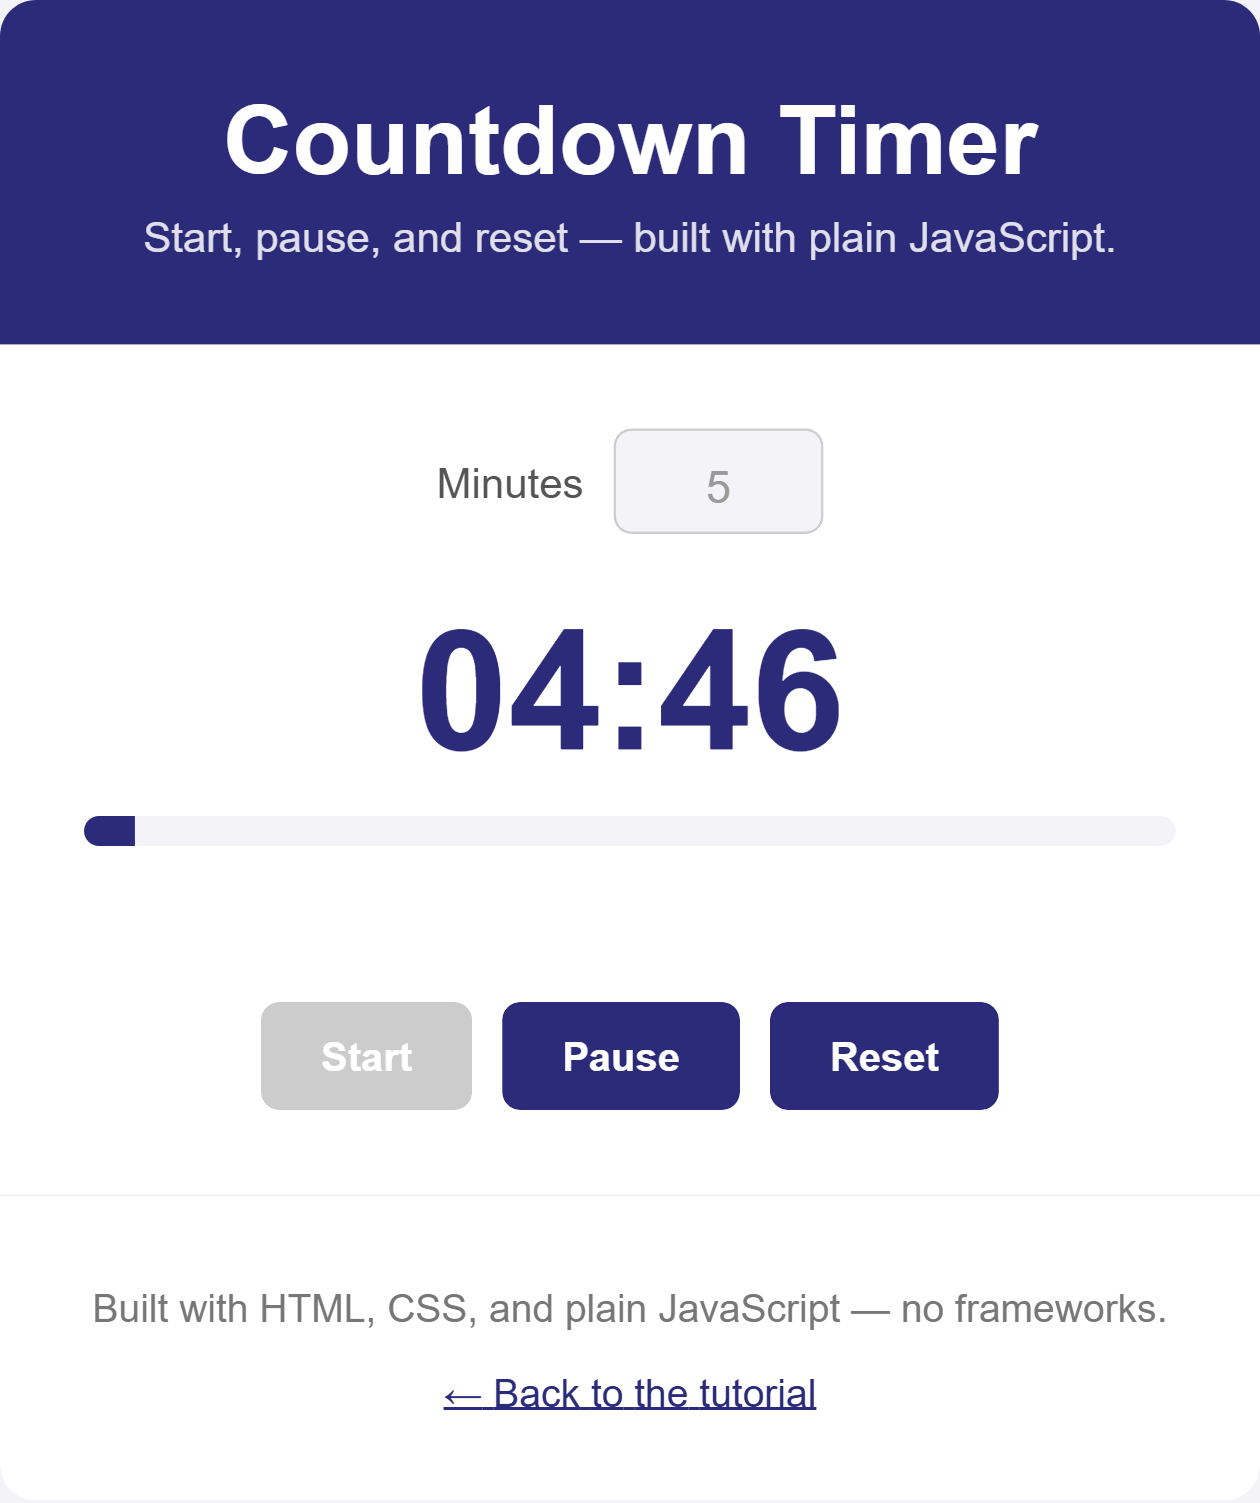
In your own browser (or the live demo above) you'll see the one thing a screenshot
fundamentally can't show: the display actually counting down, once a second, entirely
on its own — 04:52, 04:51, 04:50 — the progress bar creeping forward in sync, and
Start and Pause swapping which one is clickable the instant you use either of
them.
Try It Yourself
- Add a visual warning in the last 10 seconds: inside
tick(), after updatingremainingSeconds, checkif (remainingSeconds <= 10 && remainingSeconds > 0)and add a CSS class (e.g."urgent") totimeDisplaythat turns the text red — remove the class again inresetTimer(). - Add +1 min and -1 min buttons that adjust
minutesInput.valueby 1 (clamped between 1 and 60) and callresetTimer()immediately afterward, so the change takes effect right away without needing to click Reset separately. - Make the browser tab's title update with the time remaining while the timer runs —
set
document.title = formatTime(remainingSeconds) + " - Timer"insidetick()— so you can see the countdown even when you've switched to a different tab. - Add a lap/rounds feature: after
finishTimer(), instead of just stopping, track acompletedRoundscount, display "Round 3 complete!", and let Start begin the next round automatically using the same minutes value.
Key Takeaways
- Attribute binding (
onclick,oninput,onchange) connects a function to something the visitor does.setInterval()connects a function to time itself — it's a fundamentally different mechanism for a fundamentally different kind of "when."setInterval(fn, ms)runsfnrepeatedly;clearInterval(id), using the IDsetIntervalreturned, is the only way to stop it. - A variable that's
nullexactly when "nothing is happening" (here,intervalId) is a simple, reliable way to answer "is this already running?" before starting it again — guarding against the classic bug of accidentally stacking two intervals on top of each other. element.disabled = true/falsetoggles whether a button or input can be interacted with at all, and CSS's:disabledpseudo-class lets you style that state automatically with no extra class-juggling required.Math.floor(),%(modulo), and.padStart()together are the standard toolkit for turning a raw count of seconds into a cleanMM:SSdisplay — the same pattern shows up anywhere you need to format a duration..style.width = "40%"and tutorial 1's.style.setProperty("--custom-prop", value)are two forms of the same idea — writing directly to an element's inline style from JavaScript — one for a specific named CSS property, one for a custom property you defined yourself.