Building a Dynamic To-Do List
In Your First JavaScript Program, every element JavaScript touched already existed in the HTML — you were reading and writing properties on things that were there from the start. This tutorial takes the next real step: a to-do list where JavaScript creates the list items themselves, one per task, out of nothing but an array and a loop. Add a task, and a brand-new element appears on the page that never existed in your HTML file at all. By the end, you'll understand the single pattern almost every real interactive list — a to-do app, a shopping cart, a comment thread — is built on.
Prerequisites: Your First JavaScript Program — this
tutorial assumes you're comfortable with document.getElementById, .value,
.textContent, and attribute-based event binding (onclick, oninput), and builds
directly on top of them. You should also know basic JavaScript arrays (push, and
ideally what .filter() does) from
Core JavaScript (ES6+) —
if array.filter(x => x.done) looks unfamiliar, a quick look back at that lecture's
array-methods section first will make this tutorial much smoother.
In This Tutorial
- Understand the "one array, rebuild the list" pattern that powers most real to-do lists, shopping carts, and comment sections
- Create brand-new DOM elements from JavaScript with
document.createElement() - Bind events to elements JavaScript itself created — still using attribute binding, just generated dynamically instead of typed by hand
- Use
event.preventDefault()to stop a form from reloading the page - Use
Array.prototype.find()and.filter()to locate, update, and remove specific tasks - Build and understand a complete three-file project, then try the real thing running
Part 1: The Big Idea — One Array, Rebuilt Every Time
Tutorial 1 updated elements that were already sitting in the HTML: a fixed <p>, a
fixed <span>. A to-do list can't work that way, because you don't know in advance how
many tasks there will be — could be zero, could be forty. You need JavaScript to
create a new <li> every time a task is added, and remove one every time a task is
deleted.
The pattern this tutorial uses — and the pattern almost every real list-based UI uses, whatever framework it's written in — is this:
- Keep the real data in one plain JavaScript array (here,
tasks). This array is the single source of truth. It is never the HTML's job to "remember" what the tasks are; the array remembers, and the HTML is just a picture of it. - Whenever that array changes — a task added, toggled, or removed — call one
function that clears the
<ul>and rebuilds it from scratch, by looping over the current array and creating one<li>per task.
This might sound wasteful — why rebuild the whole list just to add one task? — but
for a list of any size a human would actually look at (tens or hundreds of items), it's
instant, and it buys you something valuable: there is only one place in the entire
program that knows how to turn data into HTML. Every button — Add, toggle, Delete,
Clear Completed — does nothing but change the tasks array, then calls that one
render function. None of them touch the DOM directly. Once you trust that pattern, a
huge class of bugs (the list and the data disagreeing with each other) simply can't
happen, because there's only ever one array telling the truth.
Part 2: Set Up Your Project Folder
Same three-file shape as last time:
style.css linked in <head>, script.js linked just before </body> — see
Part 2 of the first tutorial
if you need a refresher on exactly why each tag goes where it does.
Part 3: Build the Complete HTML
<!DOCTYPE html>
<html lang="en">
<head>
  <meta charset="UTF-8">
  <meta name="viewport" content="width=device-width, initial-scale=1.0">
  <title>My To-Do List</title>
  <link rel="stylesheet" href="style.css">
</head>
<body>
  <div class="container">
    <header>
      <h1>To-Do List</h1>
      <p class="subtitle">Add, finish, and clear tasks — built with plain JavaScript.</p>
    </header>

    <main>
      <form id="taskForm" onsubmit="addTask(event)">
        <input type="text" id="taskInput" placeholder="What do you need to do?" required>
        <button type="submit">Add Task</button>
      </form>

      <ul id="taskList"></ul>

      <div class="summary">
        <p id="taskSummary">0 tasks left</p>
        <button class="secondary" onclick="clearCompleted()">Clear Completed</button>
      </div>
    </main>

    <footer>
      <p>Built with HTML, CSS, and plain JavaScript — no frameworks.</p>
    </footer>
  </div>

  <script src="script.js"></script>
</body>
</html>
Two things are genuinely new here compared to tutorial 1:
<ul id="taskList"></ul>starts completely empty. There's no placeholder<li>to edit — every single task item you'll ever see on this page gets created by JavaScript, not written by you in this file. This is the "container JavaScript fills in" pattern: you build the empty shell in HTML, and script.js is entirely responsible for what goes inside it.<form id="taskForm" onsubmit="addTask(event)">wraps the input and button, instead of just bindingonclickto the button alone. Wrapping them in a<form>means pressing Enter while typing also adds the task — a<form>'s Enter-to-submit behavior is built into every browser for free.onsubmitis the same attribute-binding idea asonclick, just for a different event: "when this form is submitted (by clicking the button or pressing Enter), runaddTask(event)." Notice it's passedeventthis time — more on that in Part 4.
Part 4: Write the Complete JavaScript
// Every task is an object: { id, text, done }. This array is the one
// "source of truth" for the whole app — the <ul> on screen is always
// rebuilt FROM this array, never edited directly.
let tasks = [];
let nextId = 1;

// Called by the <form>'s onsubmit="addTask(event)" attribute.
function addTask(event) {
  // A form's default behavior is to submit itself to a server and reload
  // the page. event.preventDefault() cancels that default, so this page
  // can handle the submission itself instead.
  event.preventDefault();

  const input = document.getElementById("taskInput");
  const text = input.value.trim();

  if (text === "") {
    return;
  }

  tasks.push({ id: nextId, text: text, done: false });
  nextId = nextId + 1;

  input.value = "";
  renderTasks();
}

// Called by a task's onclick="toggleTask(ID)" attribute — built dynamically
// for each task inside renderTasks() below.
function toggleTask(id) {
  const task = tasks.find(function (t) {
    return t.id === id;
  });

  if (task) {
    task.done = !task.done;
  }

  renderTasks();
}

// Called by a task's onclick="deleteTask(ID)" attribute.
function deleteTask(id) {
  tasks = tasks.filter(function (t) {
    return t.id !== id;
  });

  renderTasks();
}

// Called by the "Clear Completed" button's onclick="clearCompleted()" attribute.
function clearCompleted() {
  tasks = tasks.filter(function (t) {
    return !t.done;
  });

  renderTasks();
}

// Rebuilds the entire <ul> from the tasks array. Every function above ends
// by calling this — rather than trying to patch the list in place, it's
// simplest to clear it out and build it fresh every single time.
function renderTasks() {
  const list = document.getElementById("taskList");
  list.innerHTML = "";

  if (tasks.length === 0) {
    const message = document.createElement("li");
    message.className = "empty-message";
    message.textContent = "Nothing here yet — add your first task above.";
    list.appendChild(message);
  }

  tasks.forEach(function (task) {
    const li = document.createElement("li");
    li.className = task.done ? "done" : "";

    const span = document.createElement("span");
    span.textContent = task.text;
    span.setAttribute("onclick", "toggleTask(" + task.id + ")");

    const deleteBtn = document.createElement("button");
    deleteBtn.textContent = "Delete";
    deleteBtn.setAttribute("onclick", "deleteTask(" + task.id + ")");

    li.appendChild(span);
    li.appendChild(deleteBtn);
    list.appendChild(li);
  });

  const remaining = tasks.filter(function (t) {
    return !t.done;
  }).length;

  const label = remaining === 1 ? "task" : "tasks";
  document.getElementById("taskSummary").textContent = remaining + " " + label + " left";
}

// Draw the list once when the page first loads, so the "Nothing here yet"
// message shows immediately — this isn't bound to any event, it's just the
// next line of the script, which runs the moment the browser reaches it.
renderTasks();
This is more code than tutorial 1, so let's go function by function.
The tasks array and what a "task" actually is
Each task is a plain object with three fields: id (a number, used only so other
functions can say which task they mean), text (what the visitor typed), and done
(true/false). nextId exists purely to hand out a fresh, never-reused number to
each new task — task 1 keeps its id of 1 forever, even after task 2 (id: 2) gets
deleted, which matters because toggleTask and deleteTask both need a reliable way
to say "this specific task," not just "the task at position 2" (positions shift
around every time something is removed; IDs don't).
addTask(event) — event.preventDefault() and building an object
function addTask(event) {
  event.preventDefault();
  const input = document.getElementById("taskInput");
  const text = input.value.trim();
  if (text === "") { return; }
  tasks.push({ id: nextId, text: text, done: false });
  nextId = nextId + 1;
  input.value = "";
  renderTasks();
}
Because this function is bound via onsubmit, the browser automatically passes it one
argument: an event object describing exactly what happened. event.preventDefault()
tells the browser "don't do your normal thing for this event" — and a form's normal
thing is to submit itself like an old-fashioned HTML form (sending the page away to a
server and reloading). Without this one line, clicking Add Task would reload the
page and wipe out your whole list instantly. This is the first time this tutorial series
has needed the event object itself, rather than just the fact that an event
happened.
After that: read and trim the input same as tutorial 1, bail out early with a plain
return if it's empty, then tasks.push({...}) — adding a new object to the end of the
array. input.value = "" clears the text box back to empty (the write-direction of
.value, same property tutorial 1 only ever read from). Finally, renderTasks() —
every function in this file ends with that same call, because changing the array is only
half the job; the screen doesn't know anything changed until renderTasks() runs.
toggleTask(id) and deleteTask(id) — .find() and .filter()
function toggleTask(id) {
  const task = tasks.find(function (t) { return t.id === id; });
  if (task) { task.done = !task.done; }
  renderTasks();
}

function deleteTask(id) {
  tasks = tasks.filter(function (t) { return t.id !== id; });
  renderTasks();
}
Array.prototype.find() walks the array and returns the first element for which
your function returns true — here, the one task whose .id matches. If nothing
matches, it returns undefined, which is why toggleTask checks if (task) before
touching .done — flipping done on a task that doesn't exist would otherwise throw an
error. !task.done flips a boolean: true becomes false and back again, which is
exactly "toggle."
Array.prototype.filter() is different: it returns a new array containing every
element for which your function returns true — so
tasks.filter(t => t.id !== id) means "give me every task except the one with this
id," which is precisely what "delete" means. Notice deleteTask reassigns
tasks = ..., while toggleTask mutates one task object in place and leaves
tasks itself pointing at the same array — two different, both completely normal, ways
of updating state, depending on whether you're changing one task's field or removing a
task from the collection entirely.
clearCompleted() — the same .filter() idea, one line
function clearCompleted() {
  tasks = tasks.filter(function (t) { return !t.done; });
  renderTasks();
}
"Keep every task that is not done" is a one-line .filter(), using the exact same
technique as deleteTask — just with a different condition. If you understand
deleteTask, you already understand this one.
renderTasks() — the function that does all the drawing
This is the one function that ever touches the DOM directly, and it's worth reading slowly:
First, find the <ul>, then empty it out completely. Setting .innerHTML = ""
removes every child element the list currently has. This is a safe use of innerHTML —
it's not inserting any text (yours or anyone else's), just clearing — unlike building a
string of someone's typed content and assigning it to .innerHTML, which tutorial 1
flagged as the pattern to avoid.
if (tasks.length === 0) {
  const message = document.createElement("li");
  message.className = "empty-message";
  message.textContent = "Nothing here yet — add your first task above.";
  list.appendChild(message);
}
document.createElement("li") makes a brand-new, empty <li> element — it doesn't
exist on the page yet, it only exists in JavaScript's memory until you explicitly attach
it somewhere. .className sets its CSS class (styled in style.css), .textContent
sets its text, and list.appendChild(message) is the step that actually puts it on the
page, as the last child inside <ul id="taskList">. Three lines: create, configure,
attach — the pattern every element below reuses.
tasks.forEach(function (task) {
  const li = document.createElement("li");
  li.className = task.done ? "done" : "";

  const span = document.createElement("span");
  span.textContent = task.text;
  span.setAttribute("onclick", "toggleTask(" + task.id + ")");

  const deleteBtn = document.createElement("button");
  deleteBtn.textContent = "Delete";
  deleteBtn.setAttribute("onclick", "deleteTask(" + task.id + ")");

  li.appendChild(span);
  li.appendChild(deleteBtn);
  list.appendChild(li);
});
For every task in the array (.forEach() runs its function once per element), build one
<li> containing a <span> (the task's text) and a <button> (Delete) — exactly the
create/configure/attach pattern again, three times, then nested together with
appendChild before the whole <li> is attached to the list.
Attribute binding, generated instead of typed
span.setAttribute("onclick", "toggleTask(" + task.id + ")") is the exact same
onclick="..." attribute binding from tutorial 1 — the only difference is that
instead of typing it directly into an HTML file, JavaScript is generating the
attribute string itself, with the real task's id spliced in (task id: 3 gets
the literal attribute onclick="toggleTask(3)"). The browser can't tell the
difference between an attribute you typed and one JavaScript added a moment ago —
both are bound exactly the same way. This is why attribute binding works for
elements that don't exist yet when the page first loads, which is the whole
situation a to-do list is in.
Notice task.text — the part a visitor actually typed — never goes anywhere near
setAttribute or innerHTML. It only ever reaches the page through
span.textContent = task.text, which is always safe no matter what someone types.
Only the numeric task.id (never free-typed text) gets spliced into an attribute
string.
const remaining = tasks.filter(function (t) { return !t.done; }).length;
const label = remaining === 1 ? "task" : "tasks";
document.getElementById("taskSummary").textContent = remaining + " " + label + " left";
Last, the summary line: filter down to just the not-done tasks, take .length of that
new array, pick the correctly-pluralized word ("1 task" vs. "2 tasks"), and write the
result into taskSummary with .textContent — same reliable property tutorial 1 used
for everything it displayed.
The very last line
This line isn't inside any function, and it isn't bound to any event — it's simply the
next statement in the file, so it runs immediately, once, the moment the browser finishes
loading script.js. That's what puts the "Nothing here yet" message on screen before
you've clicked anything at all.
Part 5: Style It With CSS
:root {
  --color-primary: #2b2b7a;
  --color-bg: #f4f4f8;
  --color-card: #ffffff;
  --color-text: #333333;
  --color-done: #999999;
}

* {
  box-sizing: border-box;
}

body {
  margin: 0;
  font-family: Arial, Helvetica, sans-serif;
  background-color: var(--color-bg);
  color: var(--color-text);
}

.container {
  max-width: 480px;
  margin: 40px auto;
  background-color: var(--color-card);
  border-radius: 12px;
  box-shadow: 0 4px 16px rgba(0, 0, 0, 0.08);
  overflow: hidden;
}

header {
  background-color: var(--color-primary);
  color: white;
  text-align: center;
  padding: 28px 20px;
}

header h1 {
  margin: 0 0 6px;
}

.subtitle {
  margin: 0;
  opacity: 0.85;
  font-size: 14px;
}

main {
  padding: 24px;
}

#taskForm {
  display: flex;
  gap: 8px;
  margin-bottom: 20px;
}

#taskInput {
  flex: 1;
  min-width: 0;
  padding: 10px 12px;
  font-size: 15px;
  border: 1px solid #ccc;
  border-radius: 6px;
}

button {
  padding: 10px 16px;
  background-color: var(--color-primary);
  color: white;
  border: none;
  border-radius: 6px;
  font-weight: bold;
  cursor: pointer;
}

button.secondary {
  background-color: transparent;
  color: var(--color-primary);
  border: 1px solid var(--color-primary);
  font-weight: normal;
  font-size: 13px;
  padding: 6px 12px;
}

#taskList {
  list-style: none;
  margin: 0;
  padding: 0;
}

#taskList li {
  display: flex;
  align-items: center;
  justify-content: space-between;
  padding: 10px 12px;
  background-color: var(--color-bg);
  border-radius: 6px;
  margin-bottom: 8px;
}

#taskList li span {
  cursor: pointer;
  flex: 1;
  word-break: break-word;
}

#taskList li.done span {
  text-decoration: line-through;
  color: var(--color-done);
}

#taskList li button {
  background-color: #c0392b;
  padding: 6px 10px;
  font-size: 12px;
  margin-left: 10px;
  flex-shrink: 0;
}

.summary {
  display: flex;
  justify-content: space-between;
  align-items: center;
  font-size: 13px;
  color: #777;
  margin-top: 16px;
}

.empty-message {
  text-align: center;
  color: #999;
  padding: 20px 0;
  font-style: italic;
  justify-content: center;
}

footer {
  text-align: center;
  padding: 16px;
  font-size: 13px;
  color: #777;
  border-top: 1px solid var(--color-bg);
}
The one rule worth calling out: #taskList li.done span { text-decoration: line-through;
color: var(--color-done); }. This is the CSS half of the toggle feature — JavaScript's
only job in toggleTask() was flipping a boolean and re-adding (or not re-adding) the
class "done" to an <li>. Whether that produces a strikethrough is entirely up to
this rule — exactly the same division of labor as dark-mode in tutorial 1:
JavaScript decides which class an element has; CSS decides what that class looks
like.
Part 6: See It Running
Try it live
This project is deployed right here on the site — open the live demo in a new tab. Add a few tasks, click one to mark it done, delete one, and try Clear Completed. It's the exact three files above, running as-is.
Here's the list after adding three tasks and marking one done:
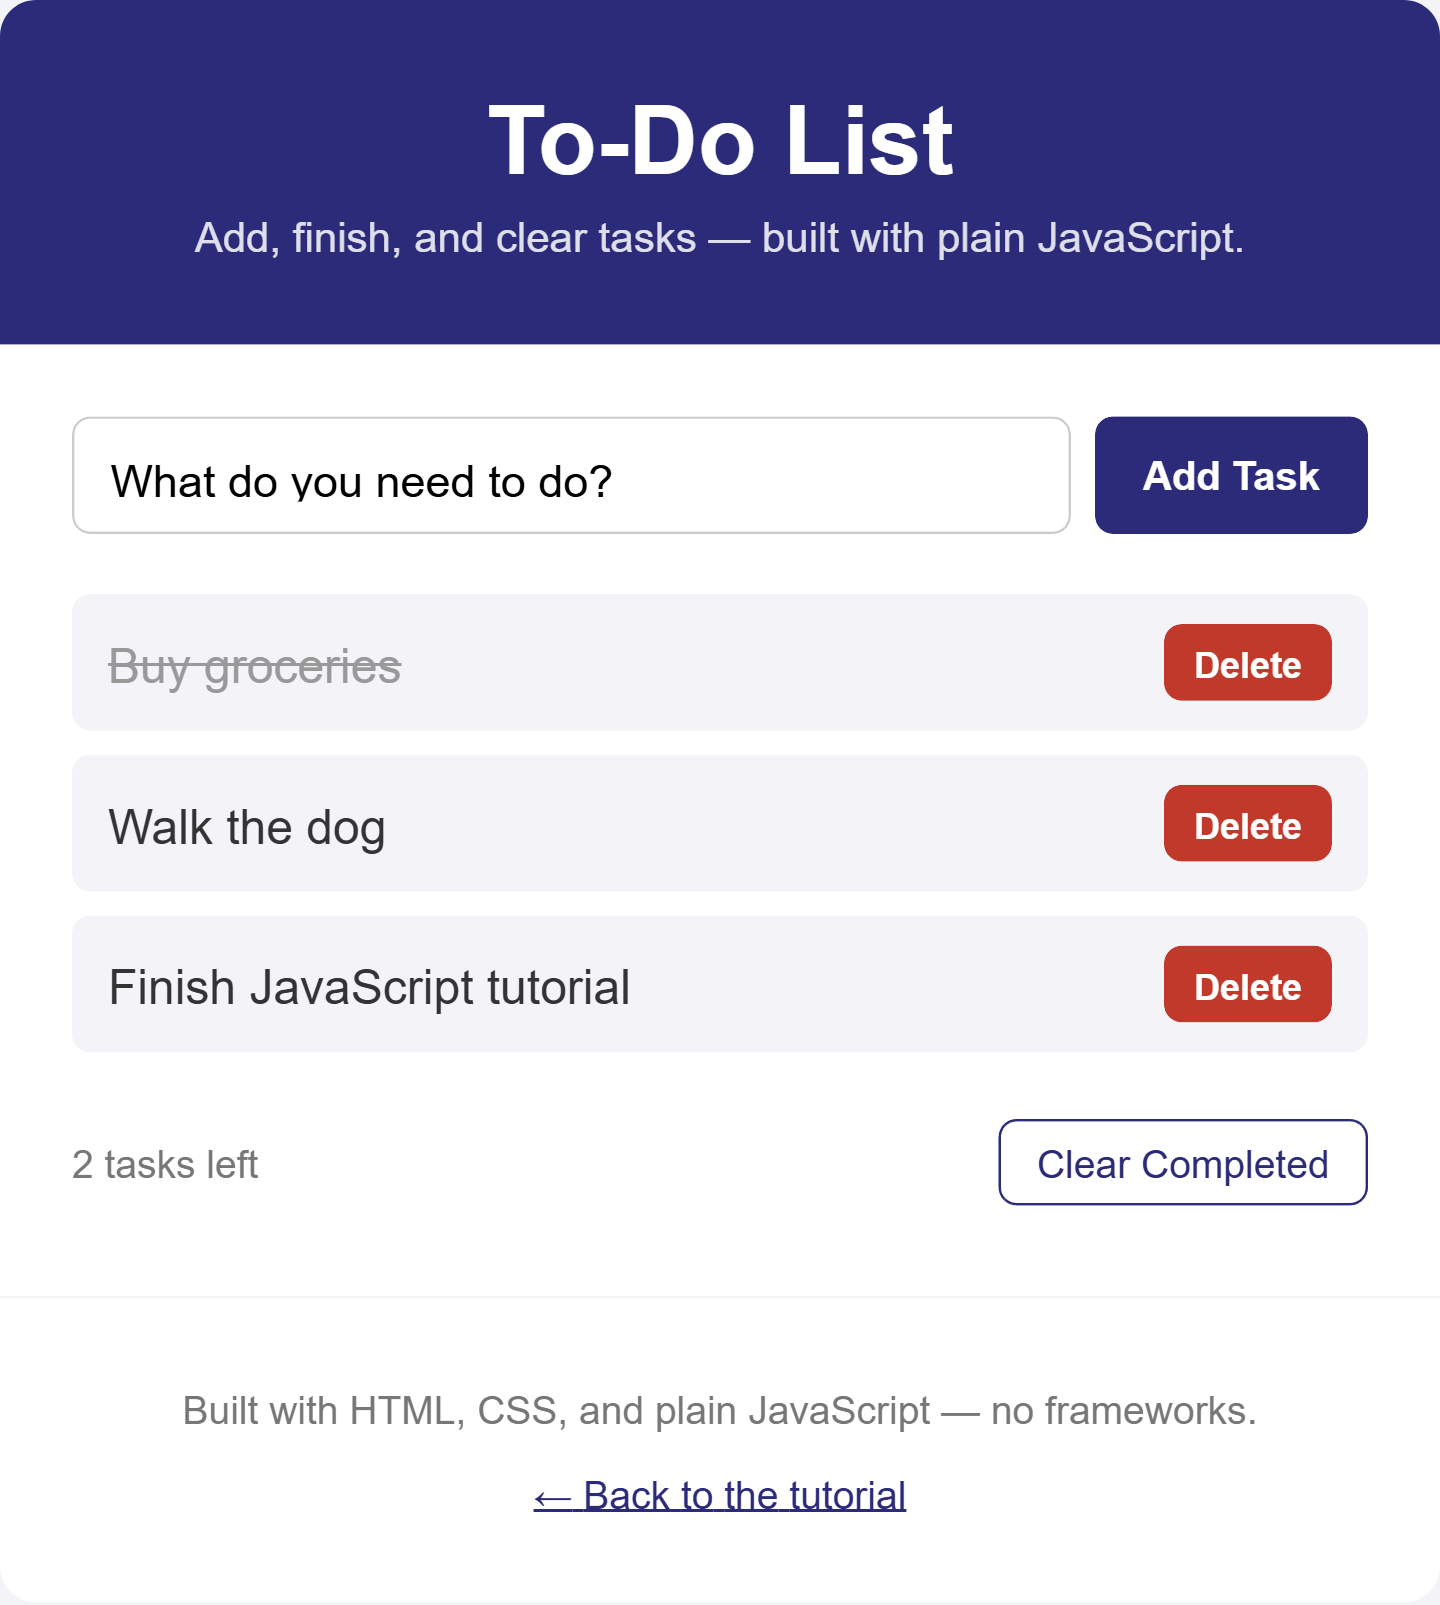
In your own browser (or the live demo above) you'll see what the screenshot can't:
typing a task and pressing Enter adds it immediately (no reload — that's
event.preventDefault() at work), clicking any task's text toggles its strikethrough
instantly, Delete removes just that one task and nothing else, and Clear
Completed sweeps away every done task in one click while leaving the rest exactly
where they were.
Try It Yourself
- Add an "Edit" button next to each task that, when clicked, fills the task input
with that task's current text and removes the original task — effectively "edit by
re-adding." (Hint: you already have everything you need —
input.value = task.textto fill the box, then calldeleteTask(task.id).) - Add a character counter below the input, updated live via
oninput, showing how many characters the visitor has typed so far — this is the exact sameoninputpattern tutorial 1 used for the name preview, just attached to a different input. - Persist the list across page reloads using
localStorage: after everyrenderTasks()call, save the array withlocalStorage.setItem("tasks", JSON.stringify(tasks)), and when the page first loads, checklocalStorage.getItem("tasks")— if it exists,JSON.parse()it back into thetasksarray before the finalrenderTasks()call runs. - Add a task counter badge in the header (e.g. "3 total, 1 done") by computing
tasks.lengthalongside the existing "remaining" count inrenderTasks().
Key Takeaways
- Real lists are built from one array plus one render function — the array is the
single source of truth, and the render function is the only code that ever turns that
data into actual DOM elements. Every other function changes the array, then calls
render; none of them touch the
<ul>directly. document.createElement(),.appendChild(), and setting properties like.className/.textContenton the result is how JavaScript builds HTML elements that never existed in your original file — create, configure, attach.- Attribute binding (
onclick="...") works identically whether you typed it by hand or generated it withsetAttribute()inside a loop — which is exactly how a dynamically created list can still have fully working buttons. event.preventDefault()stops a form's default "reload the page" behavior, which is what letsonsubmit="addTask(event)"handle a submission entirely in JavaScript..find()locates one matching element in an array;.filter()returns a new array of every element that matches (or, as withdeleteTask, every element that doesn't) — two small, reusable tools behind toggle, delete, and clear-completed alike.