Build an Event Inspector
Every tutorial so far in this series bound events with an HTML attribute —
onclick="save()" sitting right inside the tag. That's the easiest way to learn, but
it hides something important: when you click a button nested inside other elements, the
click doesn't just happen to that button. It travels through the entire page, in a
very specific order, before and after it reaches the element you actually clicked. This
project makes that order visible by logging it live, and along the way switches to the
technique real production code uses instead of onclick attributes:
addEventListener, attached entirely from a separate .js file.
Prerequisites: Your First JavaScript Program, Build a Dynamic To-Do List, and Lecture 13: DOM Manipulation and Events — this tutorial is the hands-on companion to that lecture's sections on the event life cycle and unobtrusive JavaScript, and assumes you've read those first.
In This Tutorial
- Watch an event travel through all three phases of its life cycle — capturing, target, and bubbling — by logging every phase as it fires
- Toggle a capturing-phase listener on and off and see the logged order change
- Build a dynamic task list with event delegation: one listener handling clicks on items that don't exist yet when the listener is attached
- Convert an entire project to unobtrusive JavaScript — zero
onclickattributes, one<script>tag in<head>, every handler attached withaddEventListener - Use
document.addEventListener("DOMContentLoaded", ...)to solve the timing problem that moving your script into<head>creates, and see it log a real, measured timestamp next towindow.onload's
Part 1: Why This Project Needs a Different Approach
Every previous project in this series put its script tag at the very bottom of
<body>, right before the closing tag:
That ordering was never explained, but it mattered: by the time the browser reaches a
<script> tag there, every element above it already exists, so
document.getElementById(...) always finds what it's looking for.
This project's script tag goes in <head> instead — deliberately, because that's where
unobtrusive JavaScript usually has to live in a real project (bundlers, shared layouts,
and site-wide scripts rarely get to sit at the bottom of every page's body). That one
change breaks every getElementById call immediately, because <head> runs before
<body> has been parsed at all. Part 4 shows the one line that fixes it —
document.addEventListener("DOMContentLoaded", ...) — and this project logs real
timestamps so you can see exactly when it fires relative to window.onload.
Part 2: Set Up Your Project Folder
Same three-file shape as every other project in this series:
Part 3: Build the Complete HTML
<!DOCTYPE html>
<html lang="en">
<head>
<meta charset="UTF-8">
<meta name="viewport" content="width=device-width, initial-scale=1.0">
<title>Event Inspector</title>
<link rel="stylesheet" href="style.css">
<script src="script.js"></script>
</head>
<body>
<div class="container">
<header>
<h1>Event Inspector</h1>
<p class="subtitle">
Watch capturing, target, and bubbling fire in real time — built with fully
unobtrusive JavaScript.
</p>
</header>
<main>
<section class="panel">
<h2>1. Capturing, Target, and Bubbling</h2>
<label class="capture-toggle">
<input type="checkbox" id="captureToggle">
Also listen during the capturing phase
</label>
<div id="outer" class="box box-outer">
outer
<div id="middle" class="box box-middle">
middle
<button id="inner" class="box box-inner" type="button">Click me (target)</button>
</div>
</div>
</section>
<section class="panel">
<h2>2. Event Delegation</h2>
<div class="delegation-controls">
<input type="text" id="taskInput" placeholder="New task...">
<button id="addTaskBtn" type="button">Add</button>
</div>
<ul id="taskList" class="task-list"></ul>
<p class="hint">
One listener on <ul> handles every item — including ones added after the
page loaded. Click a task to mark it done; click × to remove it.
</p>
</section>
<section class="panel">
<h2>3. DOMContentLoaded vs. window.onload</h2>
<ul id="readinessLog" class="readiness-log"></ul>
</section>
<section class="panel">
<div class="panel-header">
<h2>Event Log</h2>
<button id="clearLogBtn" type="button">Clear</button>
</div>
<ul id="eventLog" class="event-log"></ul>
</section>
</main>
<footer>
<p>Built with HTML, CSS, and plain JavaScript — no frameworks.</p>
</footer>
</div>
</body>
</html>
Notice there is not a single onclick, onchange, or any other event attribute
anywhere in this file — every interactive element here is just plain, inert HTML. That
is what makes it unobtrusive: the markup describes structure only, and says nothing
at all about behavior. Every bit of behavior lives in script.js, which you'll build
next.
Part 4: Write the Complete JavaScript
// -----------------------------------------------------------------
// Part 0: Readiness — DOMContentLoaded vs. window.onload
// -----------------------------------------------------------------
// This script tag lives in <head>, so none of the elements referenced
// below exist yet the instant this file first runs. Everything that
// touches the page is wrapped in DOMContentLoaded, which waits until
// the HTML has been fully parsed — but does NOT wait for images or
// other external resources, unlike window.onload.
function logReadiness(label) {
  const list = document.getElementById("readinessLog");
  if (!list) return;
  const item = document.createElement("li");
  item.textContent = `${label} fired at ${performance.now().toFixed(1)}ms`;
  list.appendChild(item);
}

document.addEventListener("DOMContentLoaded", () => {
  logReadiness("DOMContentLoaded");
  setupPhaseDemo();
  setupDelegation();
});

window.onload = () => {
  logReadiness("window.onload");
};

// -----------------------------------------------------------------
// Part 1: Capturing, target, and bubbling
// -----------------------------------------------------------------
function appendLog(text) {
  const list = document.getElementById("eventLog");
  const item = document.createElement("li");
  item.textContent = text;
  list.prepend(item); // newest entry on top
}

function setupPhaseDemo() {
  const captureToggle = document.getElementById("captureToggle");
  const ids = ["outer", "middle", "inner"];
  const captureHandlers = new Map();

  ids.forEach((id) => {
    const el = document.getElementById(id);

    // Bubbling-phase listener: always attached, on every level.
    el.addEventListener("click", (event) => {
      appendLog(`BUBBLE  (phase ${event.eventPhase}): ${id}`);
    });

    // Capturing-phase listener: only attached while the checkbox is
    // checked, so you can directly compare the log with and without it.
    captureHandlers.set(id, (event) => {
      appendLog(`CAPTURE (phase ${event.eventPhase}): ${id}`);
    });
  });

  captureToggle.addEventListener("change", () => {
    ids.forEach((id) => {
      const el = document.getElementById(id);
      const handler = captureHandlers.get(id);
      if (captureToggle.checked) {
        el.addEventListener("click", handler, true); // true = capturing phase
      } else {
        el.removeEventListener("click", handler, true);
      }
    });
  });

  document.getElementById("clearLogBtn").addEventListener("click", () => {
    document.getElementById("eventLog").innerHTML = "";
  });
}

// -----------------------------------------------------------------
// Part 2: Event delegation
// -----------------------------------------------------------------
function setupDelegation() {
  const input = document.getElementById("taskInput");
  const list = document.getElementById("taskList");

  function addTask() {
    const text = input.value.trim();
    if (text === "") return;

    const item = document.createElement("li");

    const label = document.createElement("span");
    label.textContent = text;

    const removeBtn = document.createElement("button");
    removeBtn.className = "remove-btn";
    removeBtn.type = "button";
    removeBtn.textContent = "×";

    item.appendChild(label);
    item.appendChild(removeBtn);
    list.appendChild(item);

    input.value = "";
    input.focus();
  }

  document.getElementById("addTaskBtn").addEventListener("click", addTask);
  input.addEventListener("keydown", (event) => {
    if (event.key === "Enter") addTask();
  });

  // ONE listener on the parent <ul> handles every <li> inside it — even
  // ones created above, AFTER this listener was already attached. That
  // only works because a click on a child bubbles up to this parent.
  list.addEventListener("click", (event) => {
    if (event.target.classList.contains("remove-btn")) {
      event.target.closest("li").remove();
      return;
    }
    if (event.target.tagName === "SPAN") {
      event.target.closest("li").classList.toggle("done");
    }
  });
}
Let's go through the new ideas one at a time.
DOMContentLoaded — the line that makes <head> safe
document.addEventListener("DOMContentLoaded", () => {
  logReadiness("DOMContentLoaded");
  setupPhaseDemo();
  setupDelegation();
});
Everything that calls document.getElementById anywhere in this file is nested inside
this one listener. DOMContentLoaded fires the instant the browser finishes parsing the
HTML into a DOM tree — every element in Part 3's markup is guaranteed to exist by the
time this function runs, no matter where the <script> tag that loaded this file sits.
Compare that to window.onload, right below it:
window.onload also works — it fires after DOMContentLoaded, once every last
resource on the page (images, stylesheets, fonts) has finished loading — but it's
strictly the slower of the two. This project has no large images to wait on, so when
you run it, you'll see both timestamps logged only a few milliseconds apart. On a real
page with slow-loading images, that gap can stretch to a full second or more — which is
exactly why DOMContentLoaded is the right default for setup code that only needs
elements to exist, not resources to have finished downloading.
window.onload = fn, not addEventListener
This project intentionally writes window.onload = () => {...} to show the older
style you'll still see in existing code — but it has a real limitation:
assigning to .onload directly only allows one handler; a second assignment
silently replaces the first. DOMContentLoaded is attached with
addEventListener, which allows any number of independent listeners. If you need
multiple things to run on full page load, use
window.addEventListener("load", fn) instead of window.onload = fn.
setupPhaseDemo() — logging all three phases
ids.forEach((id) => {
  const el = document.getElementById(id);
  el.addEventListener("click", (event) => {
    appendLog(`BUBBLE  (phase ${event.eventPhase}): ${id}`);
  });
  captureHandlers.set(id, (event) => {
    appendLog(`CAPTURE (phase ${event.eventPhase}): ${id}`);
  });
});
Every one of the three nested boxes — outer, middle, inner — gets a bubbling-phase
listener attached immediately (the plain, three-argument-less addEventListener call
always means bubbling). The matching capturing-phase handler for each box is built
too, but just stored in a Map for now rather than attached — that happens separately,
based on the checkbox:
captureToggle.addEventListener("change", () => {
  ids.forEach((id) => {
    const el = document.getElementById(id);
    const handler = captureHandlers.get(id);
    if (captureToggle.checked) {
      el.addEventListener("click", handler, true);
    } else {
      el.removeEventListener("click", handler, true);
    }
  });
});
Checking the box attaches all three capturing listeners with true as the third
argument; unchecking it removes them with removeEventListener — which requires
passing the exact same function reference that was attached, which is precisely why
each handler was built once and stored in captureHandlers instead of being written
inline twice. With the checkbox checked, clicking the innermost button logs, from oldest
to newest:
CAPTURE (phase 1): outer
CAPTURE (phase 1): middle
CAPTURE (phase 2): inner
BUBBLE  (phase 2): inner
BUBBLE  (phase 3): middle
BUBBLE  (phase 3): outer
(The on-page log shows the newest entry at the top — list.prepend(item) in
appendLog puts each new line above the last, so reading top-to-bottom on the page is
reverse chronological order. The block above is the true, as-it-happened order.)
event.eventPhase confirms what's happening at each step: 1 while still capturing
down, 2 exactly when the event is at its target (inner logs phase 2 for both of
its own listeners — this is the target phase, sitting right between capturing and
bubbling), and 3 while bubbling back up. Notice outer and middle never show phase
2 — only the actual target element does.
setupDelegation() — one listener, any number of items
list.addEventListener("click", (event) => {
  if (event.target.classList.contains("remove-btn")) {
    event.target.closest("li").remove();
    return;
  }
  if (event.target.tagName === "SPAN") {
    event.target.closest("li").classList.toggle("done");
  }
});
This listener is attached to #taskList exactly once, when the page loads — when
the list is still empty. Every <li> added later by addTask() is still handled
correctly, because a click on any <li> (or the <span>/button inside it) bubbles
up to this <ul>, where this one listener is waiting. event.target tells it exactly
which part of which item was actually clicked — the × button, the task text, or
neither — without needing a separate listener attached to every item individually.
This is the practical payoff of bubbling
The event life cycle in Part 1 can feel academic in isolation, but delegation is
the everyday reason it matters: without bubbling, a dynamically added <li> would
need its own listener attached the moment it's created, every single time, for
every list on every page. Bubbling means one listener on a stable parent is enough,
forever — which is exactly the pattern Lecture 13 introduces and this project puts
into practice.
Part 5: Style It With CSS
:root {
  --color-primary: #c9680f;
  --color-bg: #f4f4f8;
  --color-card: #ffffff;
  --color-text: #333333;
  --color-done: #1f8a4c;
  --color-danger: #c0392b;
}

* {
  box-sizing: border-box;
}

body {
  margin: 0;
  font-family: Arial, Helvetica, sans-serif;
  background-color: var(--color-bg);
  color: var(--color-text);
}

.container {
  max-width: 560px;
  margin: 40px auto;
  background-color: var(--color-card);
  border-radius: 12px;
  box-shadow: 0 4px 16px rgba(0, 0, 0, 0.08);
  overflow: hidden;
}

header {
  background-color: var(--color-primary);
  color: white;
  text-align: center;
  padding: 28px 24px;
}

header h1 {
  margin: 0 0 6px;
}

.subtitle {
  margin: 0;
  opacity: 0.9;
  font-size: 14px;
}

main {
  padding: 24px 28px;
}

.panel {
  margin-bottom: 28px;
  padding-bottom: 24px;
  border-bottom: 1px solid var(--color-bg);
}

.panel:last-child {
  margin-bottom: 0;
  padding-bottom: 0;
  border-bottom: none;
}

.panel h2 {
  font-size: 17px;
  margin: 0 0 12px;
}

.panel-header {
  display: flex;
  align-items: center;
  justify-content: space-between;
}

.panel-header h2 {
  margin: 0;
}

.capture-toggle {
  display: block;
  font-size: 14px;
  margin-bottom: 14px;
  color: #555;
}

.box {
  padding: 18px;
  border-radius: 8px;
  font-size: 13px;
  font-weight: bold;
  color: white;
}

.box-outer {
  background-color: #2b2b7a;
}

.box-middle {
  background-color: #4b4bb8;
  margin-top: 10px;
  padding-bottom: 18px;
}

.box-inner {
  display: block;
  margin-top: 10px;
  background-color: var(--color-primary);
  border: none;
  border-radius: 6px;
  padding: 10px 16px;
  font-size: 13px;
  font-weight: bold;
  color: white;
  cursor: pointer;
}

.delegation-controls {
  display: flex;
  gap: 8px;
  margin-bottom: 12px;
}

#taskInput {
  flex: 1;
  padding: 8px 10px;
  font-size: 14px;
  border: 1px solid #ccc;
  border-radius: 6px;
}

.task-list {
  list-style: none;
  margin: 0 0 10px;
  padding: 0;
}

.task-list li {
  display: flex;
  align-items: center;
  justify-content: space-between;
  padding: 10px 12px;
  background-color: var(--color-bg);
  border-radius: 6px;
  margin-bottom: 6px;
  cursor: pointer;
}

.task-list li.done span {
  text-decoration: line-through;
  color: var(--color-done);
}

.remove-btn {
  background: none;
  border: none;
  color: var(--color-danger);
  font-size: 16px;
  line-height: 1;
  cursor: pointer;
  padding: 0 4px;
}

.hint {
  font-size: 13px;
  color: #777;
  margin: 0;
}

.readiness-log,
.event-log {
  list-style: none;
  margin: 0;
  padding: 0;
  font-family: "Courier New", Courier, monospace;
  font-size: 13px;
  max-height: 180px;
  overflow-y: auto;
  background-color: var(--color-bg);
  border-radius: 6px;
}

.readiness-log li,
.event-log li {
  padding: 6px 10px;
  border-bottom: 1px solid #e4e4ec;
}

.readiness-log li:last-child,
.event-log li:last-child {
  border-bottom: none;
}

button {
  padding: 8px 16px;
  background-color: var(--color-primary);
  color: white;
  border: none;
  border-radius: 6px;
  font-weight: bold;
  cursor: pointer;
}

footer {
  text-align: center;
  padding: 16px;
  font-size: 13px;
  color: #777;
  border-top: 1px solid var(--color-bg);
}
Nothing here is new beyond what earlier tutorials in this series already used —
max-height + overflow-y: auto on .readiness-log/.event-log is the one detail
worth calling out, since it's what keeps a long-running log scrollable inside a fixed
box instead of growing the whole page taller forever.
Part 6: See It Running
Try it live
This project is deployed right here on the site — open the
live demo in a new
tab. Check "Also listen during the capturing phase," click the orange button, and
watch all six log lines appear in exactly the order Lecture 13 describes. Then add
a few tasks and click one — the delegated listener handles it even though that
<li> didn't exist when the page loaded.
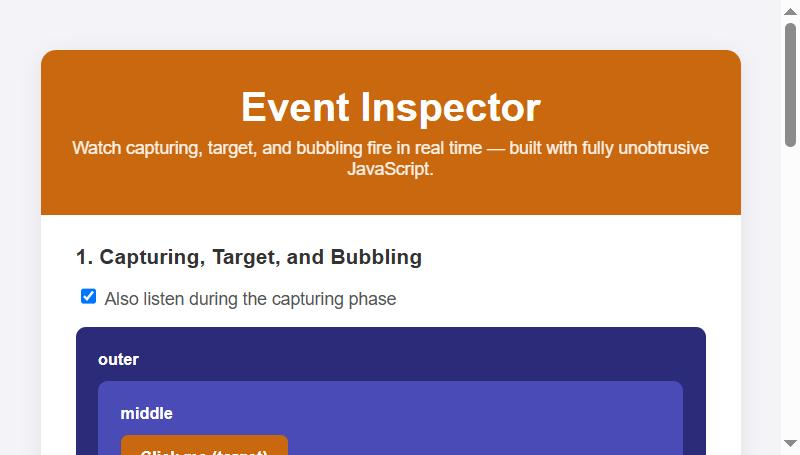
Here's the Event Inspector after checking the capturing-phase box:
Try It Yourself
- Add a fourth nesting level (an element inside
#inner) and extend theidsarray and the HTML to match. Predict the new six-line log order before you click, then check your prediction against what's actually logged. - Add
event.stopPropagation()to themiddlebox's bubbling listener. Click the inner button again — which log lines stop appearing, and why doesouternever find out the click happened at all? - The delegation listener currently checks
event.target.tagName === "SPAN"to decide whether to toggledone. Change a task's label from a<span>to a<strong>and update the delegation code to match — this is a good way to confirm you understand why that check exists, rather than just copying it. - Add a
window.addEventListener("load", ...)call (notwindow.onload =) with a second, independent logger, and confirm — by reading Part 4's note on why that matters — that both your new listener and the original still both run.
Key Takeaways
- A click doesn't just happen to the element you clicked — it travels down from
document(capturing), arrives at the element itself (target), then travels back up todocument(bubbling).addEventListener's third argument chooses which of capturing or bubbling a given listener reacts to. event.eventPhase(1,2, or3) tells a handler which phase it's currently running in;event.targetis always the element the user actually interacted with, regardless of which element the listener is attached to.- Event delegation — one listener on a stable parent, instead of one per child — is bubbling's everyday practical payoff: it works correctly for elements created after the listener was attached, with no re-attaching required.
- Unobtrusive JavaScript means zero event attributes in the HTML — every handler is
attached from a separate script with
addEventListener, which also allows more than one independent listener per element, unlike an attribute or a.onload/.onclickassignment. document.addEventListener("DOMContentLoaded", ...)is what makes a<script>tag safe to place in<head>(or anywhere else that runs before the body is parsed) — it fires as soon as the DOM exists, without waiting on images or other slow external resources the waywindow.onloaddoes.